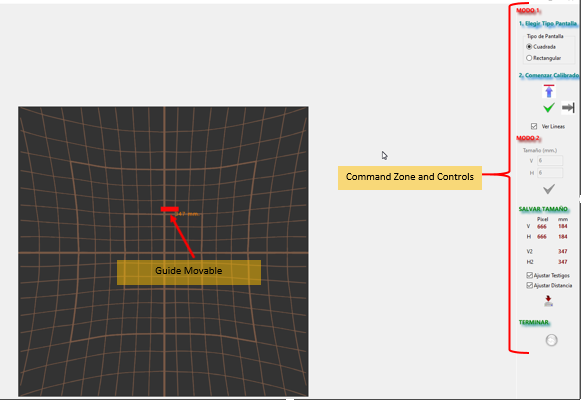
The window is divided into 3 parts:
· Left, in which the current cursor position (X and Y coordinates) is displayed.
· Center, where the scanning screen with the current size is displayed. At its level are visible the movable tokens used to set the size if manual mode is chosen.
· Right, where the commands necessary to start, set and save the chosen size are located.
There are 2 ways to set the size of the examination window:
· Manual mode. This mode allows to select whether we want to use a square screen, as usual, or a rectangular one. When the corresponding button is pressed, a vertically scrollable token becomes visible and indicates the size in millimeters that the screen will be in that position.
· Automatic mode. Simply enter the size in millimeters that you want the screen to be.
The size of the telltales and the scanning distance can be automatically adjusted in relation to the chosen screen size.
The characteristics and drawing of this screen are shown in Annex B-01.
Annex B-02 shows in detail the interface for setting the size.

